Wednesday, September 05, 2018

Driveway Seal


March 11, the open-house.  It was obvious then that the driveway would need some work!

Grass-filled cracks can be seen everywhere. The hemlocks to the right are spilling over onto the drive way.  They would first need to be tamed.


After cutting of the hemlocks, and clearing of the dead branches beneath, a row of spindly bushes remain that I expect will eventually fill  back in:


July 8:

Several pickup truck loads to the dump were made, with all the hemlock cuttings.

A very crackly driveway can be seen below, with bottles of crack sealer ready to go.  In the end, I went through maybe 10 of those gallon jars, then about seven 5-gallon pails of seal coat. Crack filler fills the cracks, while seal coat covers the whole driveway and slows the deterioration of asphalt pavement.


Wire brushes and anything else to clear grass and dirt from the cracks, before sealing.


July 12:

Partway through, in photo below, I've troweled in a special rubberized crack filler to the larger cracks.


July 21


A break to replace the post lamp fixture over the driveway.


Sept. 2, after seal coating!


The seal coat is applied using a giant broom-size squeegee, except along the edges where I used a large paint brush.  Seal coat comes in those large pails.  It took seven of them to cover a 100x20 ft driveway.


blueberries


Ed who used to live here said come by if you want more blueberry bushes.  He lives a few miles away now.  I didn't get any more this year, just as well since I already have seven. 

The berries started showing up early June then were ready mid July.

June 6:


June 18


June 18, where the bushes further east, closer to the house stayed green longer:

In the above picture, you can see the netting that I put up.

July 3:


July 8:

July 14:


Several pints came out of those bushes!

Monday, July 23, 2018

Neptunalia

Neptune is the street's namesake and same for the twine and cord mill, having manufactured rope for sailing ships back in the 1800s.

Neptunalia, being celebrated today by not very many these days:

http://www.creatinghistory.com/neptunalia/

Sign for the old cord mill:


The ghost town of Johnsonville, a period village at Neptune mills just outside Moodus.  It's not maintained for visitors, but perhaps someday.

Monday, July 02, 2018

the young garden

The immense Sun, somehow brings this all about.


Below, is scenery from the road in Ohio.  After finishing with my work, I looped through West Virginia, before heading back to Columbus for the flight home.

Crossing over the Ohio River...


Ohio Route 124 followed the river a ways.


Below, the river, somewhere


Below, a detour between hotel and work site. The detour took me through windy roads, through very Appalachian scenery. Most homes seemed to each be situated in their own mini-valleys.


More along the river....


Sustenance near Columbus OH airport


Stuart!  He'd been laying on that flagstone for a while. The stone must have been cooler to lay on than than the grass or wood table, in this weather.


Below is a $60 print at Target.  I didn't want this one, but took this photo because the muted colors and abstract design are elements that could work as I look for something to hang in the closed-in front porch.  Part of the long path of inspiration.


Morning light


Blueberry bushes, surrounded by stakes, draped over with bird netting.


Young watermelon vine.

Several are just starting to sprout. It will be late season before any are ready!


Our hero


Bird Netting


Above, the swing bridge


Thursday, June 07, 2018

Hatchway and Garden


These wooden hatchway doors just crumbled in my hands, trying to lift these hatchway doors.  They are about to be replaced!!


Below, can you see the new piece of CDX plywood, which will become a replacement door. I first cut the plywood to size. And in the picture below, he old door is sitting on top of the new door.  See how much of the old door rotted away!


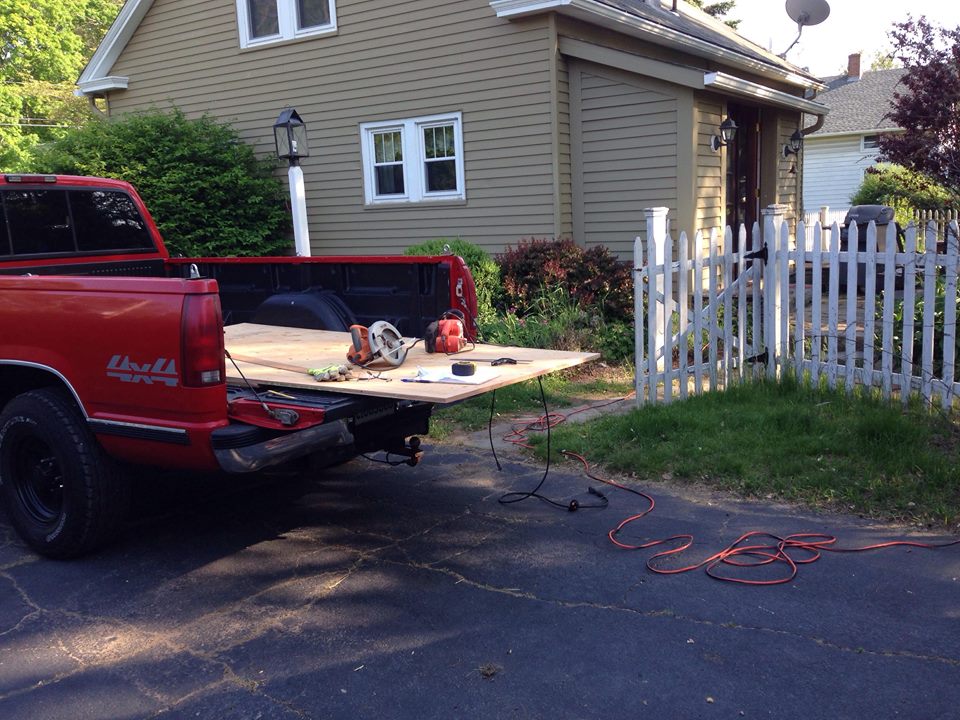
Before cutting the plywood sheets, you can see the new uncut plywood with measuring, cutting and sanding tools!  The pickup tail gate makes a sufficient work bench.


After cutting and sanding the doors, four or five coats of oil-based Rust-oleum should keep the doors in good shape for a couple years!  Below, are the partially painted doors (white) against the garage.


Below, voila the new doors!  I kept the old hinges.  You can see the new handles, and new bolts holding a new plank at the overlap! Eventually I'll paint it to match the house.


Meanwhile the back yard,


and the misty field beyond,


are not taking long to get used to.


Yellow irises:


Stuart!


Purple irises are in the photo below. The garden is further back in this picture below. Posts surround the garden, and the posts hold up plastic netting to surround the garden and protect it from deer and other hungry beasts. Work on the garden is about to begin.  A pile of vines that I pulled out can be seen in the center of the garden.  Sore legs for days, after pulling up feisty vines. Vines were were taking over the posts and netting around the garden.


In the photo below, you see a crumpled plastic cover which is to keep weeds down.  At this point I am in process of pulling the cover up, so I can till the soil.


You can't see it, but in the truck are bags of lime and composted manure, to mix into the garden.

Below is the roto-tiller.  It came with my first house and I've held on to it.  Blades in the tiller will mix and loosen soil to several inchess deep.


Below, the garden plot is ready to be tilled, with roots and weeds raked away.


Below are bags of manure (purple) and lime (white).  The dark splotches are manure, and the white is powdered lime, from a couple bags which I've already emptied.  Next, I'll spread the manure and lime around, then mix it into the soil using the roto-tiller.


Below is the garden after most of the tilling is done. The tiller mixed the lime, manure, and soil together. This being an old farm, seems to have very soft fertile soil already.


After tilling, the garden is covered with plastic again. Those squares are carpet remnants and field stone to weigh the plastic down.  The plastic, carpet squares, and garden fence all came with the house.  It will be interesting to see how the plastic works.  Plastic keeps down weeds but also keeps out alot of rain.  So I may have to water more.


After a trip to the nursery: Tomatos, sunflowers, pumpkin, watermelon, and Delicata squash will be planted!
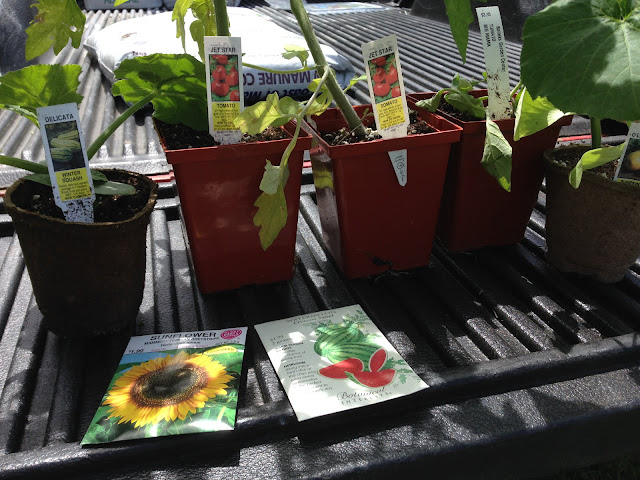


Planting tomatos, in a hole cut in the plastic. Here you can see more lime and manure going in, right where I'm planting. Nourishment to provide many big tomatos!


Meanwhile blossoms of an unknown type...


Everything planted!  I've left alot of room for pumpkin and squash to spread over, and I may plant more things.


Blueberries June 3


Blueberries June 4

Mohawk Trail leaf peepage

  In this post there is much foliage to be seen between Greenfield and North Adams, in northwest Massachusetts. You'll see a series of p...